Posted by admin on December 9, 2009 under Tech Tips | 
If you’re running the Gnome desktop environment and would like to have GnuPG context menu options in Nautilus to encrypt, decrypt, and digitally sign files, simply install the Seahorse plugins package available in your favorite Linux distribution repositories. If using Debian or Ubuntu, it’s as easy as an apt-get install.
sudo apt-get install seahorse-plugins
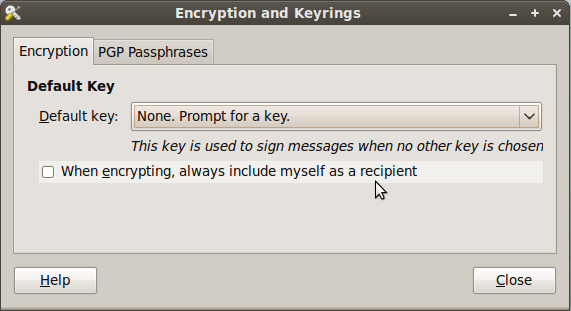
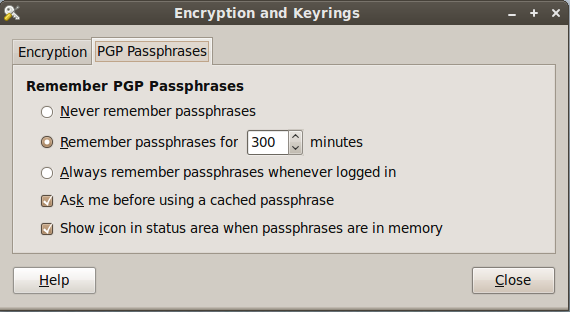
After installing the package, go to System -> Preferences -> Encryption and Keyrings, select a default key to use and decide whether you want to include your own key by default when encrypting files. This is sometimes a good idea if you ever want to open a file you encrypted to someone else. Below are some screenshots of the Seahorse preferences.
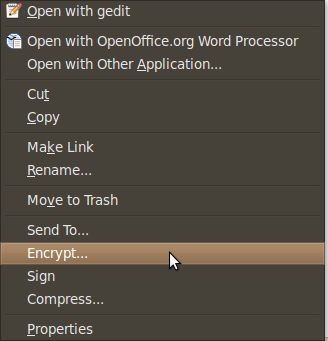
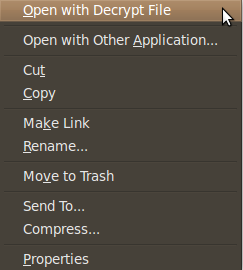
Here are some screen shots of the context menu options that appear when you right click on files in Nautilus.
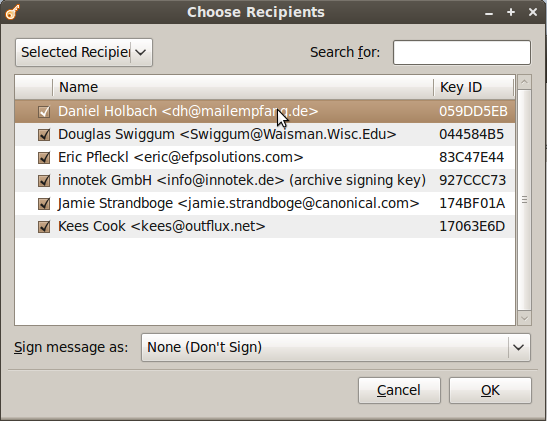
When you choose to encrypt a file, you can select as many public keys as you’d like. Here’s an example of the dialogue.
Using PGP has never been easier. There are still some improvements to the UI I would like to see completed, but overall the most important features are there.
Posted by admin on July 20, 2008 under Tech Tips |
Nautilus, the default file manager used by Gnome desktop environment, sports many features that make every day use a real joy. Here’s a brief look at the different file selection options available in Nautilus as of version 2.22.3.
Multiple File Selections:
You can select multiple file ranges with multiple “shift+click” combinations. Other less advanced file managers typically lose focus on previously selected objects if you try to “shift+click” another set of files, but Nautilus handles this quite well. The following screenshot demonstrates the feature.

Pattern Selection:
You can select files by patterns in their naming convention. For example, if you would like to select only files with a particular extension, go to “Edit… Select Pattern“, or use the keyboard shortcut of “Ctrl+S“. Type in a search pattern such as “*.ogg” and click OK. The following screenshot shows the pattern select dialog.

Type-Ahead Search:
Simply typing text while focused in a Nautilus window will highlight the first matching file or folder name. Taking this simple concept one step further, if you hit the keyboard Up or Down arrows, Nautilus will focus the next matching object. Again, this is quite intuitive, since other file managers simply move the focus from the currently selected object to one that is immediately adjacent. Keep hitting the Up and Down arrows to jump between matching objects.

Standard File Search:
Of course, when you just want to perform a standard file search, you can hit the Search button, or use the “Ctrl+F” keyboard shortcut. The dialog is pretty simple to understand, and gives you a decent set of options to choose from.

Be sure to keep a lookout for many more exciting features from the Nautilus developers as they continue the trend of inovation at its finest. Hope you found these quick tips useful for your daily Nautilus usage routine.


