Posted by admin on December 1, 2009 under Tech Tips | 
When adding third party software repositories to your APT sources list, you can easily download a referenced PGP key to your APT keyring using the advanced options of the apt-key utility.
For example, if you are adding a third party repository that references the PGP key ID of 6E80C6B7, the following will work as long as the key has been uploaded to a keyserver.
sudo apt-key adv --keyserver keyserver.ubuntu.com --recv-keys 6E80C6B7

gpg: requesting key 6E80C6B7 from hkp server keyserver.ubuntu.com

gpg: key 6E80C6B7: public key "Launchpad PPA for Banshee Team" imported

gpg: no ultimately trusted keys found

gpg: Total number processed: 1

gpg: imported: 1 (RSA: 1)
Typically, instructions on adding repositories give readers a two or three step process that involves apt-key reading a key from a text file or piped from a wget command. The above just cuts all that nonsense out.
The apt-key man page is a bit bare, but there are a few other options you might find interesting that are only mentioned in the commands help output.
apt-key

Usage: apt-key [command] [arguments]
Manage apt's list of trusted keys
apt-key add - add the key contained in ('-' for stdin)

apt-key del - remove the key

apt-key export - output the key

apt-key exportall - output all trusted keys

apt-key update - update keys using the keyring package

apt-key net-update - update keys using the network

apt-key list - list keys

apt-key finger - list fingerprints

apt-key adv - pass advanced options to gpg (download key)
Posted by admin on November 4, 2009 under Tech Tips |
If you ever want to quickly protect a file by encrypting it with a simple password, you can use GnuPG and symmetric key encryption for the job. Using this method, you can use industry strength encryption like AES256 and not have to worry about public and private keys. Just remember your password and use PGP compatible software to decrypt the files when needed.
For example, this is how you can encrypt a zip file called backup.zip and output the result to a new file called backup.zip.gpg.
gpg --symmetric --cipher-algo aes256 -o backup.zip.gpg backup.zip

Enter passphrase: *******

Repeat passphrase: *******
To decrypt the file, the following will work.
gpg -d -o backup.zip backup.zip.gpg

gpg: AES256 encrypted data

Enter passphrase: *******

gpg: encrypted with 1 passphrase
For fun, here’s how to create a Gzip Tar archive (tar.gz) and encrypt it on the fly.
tar czvpf - SomeFiles/ | gpg --symmetric --cipher-algo aes256 -o backup.tar.gz.gpg

Enter passphrase: *******

Repeat passphrase: *******
To decrypt and extract in a single command, the following also works.
gpg -d backup.tar.gz.gpg | tar xzvf -

gpg: AES256 encrypted data

Enter passphrase: *******

gpg: encrypted with 1 passphrase
If you’re curious to know what other ciphers are available to you, simple use the gpg --versioncommand.
gpg --version | grep Cipher

Cipher: 3DES, CAST5, BLOWFISH, AES, AES192, AES256, TWOFISH
Posted by admin on November 3, 2009 under Tech Tips |
If you want to gain quick insight into the basic properties of a video file from the Linux command line, there’s a few really easy methods. The information you might be interested in are audio and video codecs, resolution, frame rates, bitrates, etc.
Using mplayer, you can see some basic information about a video file. For example, the following video is using the WMV3 video codec at the resolution of 1280×720 (720p), the bitrate of 3000 kbps, etc.
mplayer video.wmv -vo null -ao null -frames 0 2>&1 /dev/null | egrep "(VIDEO|AUDIO)"

VIDEO: [WMV3] 1280x720 24bpp 1000.000 fps 3000.0 kbps (366.2 kbyte/s)

AUDIO: 44100 Hz, 2 ch, s16le, 96.0 kbit/6.80% (ratio: 12003->176400)
The audio rate is shown to be 44100 Hz using 2-Channel stereo, but the codec is not listed. You can get additional information with the -identify option.
mplayer video.wmv -identify -vo null -ao null -frames 0 2>&1 /dev/null | egrep "(^ID|VIDEO|AUDIO)"

ID_AUDIO_ID=1

ID_VIDEO_ID=2

VIDEO: [WMV3] 1280x720 24bpp 1000.000 fps 3000.0 kbps (366.2 kbyte/s)

ID_CLIP_INFO_NAME0=name

ID_CLIP_INFO_VALUE0=

ID_CLIP_INFO_NAME1=author

ID_CLIP_INFO_VALUE1=

ID_CLIP_INFO_NAME2=copyright

ID_CLIP_INFO_VALUE2=

ID_CLIP_INFO_NAME3=comments

ID_CLIP_INFO_VALUE3=

ID_CLIP_INFO_N=4

ID_FILENAME=video.wmv

ID_DEMUXER=asf

ID_VIDEO_FORMAT=WMV3

ID_VIDEO_BITRATE=3000000

ID_VIDEO_WIDTH=1280

ID_VIDEO_HEIGHT=720

ID_VIDEO_FPS=1000.000

ID_VIDEO_ASPECT=1.7778

ID_AUDIO_FORMAT=353

ID_AUDIO_BITRATE=0

ID_AUDIO_RATE=0

ID_AUDIO_NCH=0

ID_LENGTH=2116.00

ID_VIDEO_ASPECT=1.7778

ID_VIDEO_CODEC=wmv9dmo

AUDIO: 44100 Hz, 2 ch, s16le, 96.0 kbit/6.80% (ratio: 12003->176400)

ID_AUDIO_BITRATE=96024

ID_AUDIO_RATE=44100

ID_AUDIO_NCH=2

ID_AUDIO_CODEC=ffwmav2
Another great tool for identifying video attributes is idvid. idvid comes with the tovid package, so be sure to install it from your repository. It is a bit slow, but the output is very clean and easy to interpret.
idvid video.wmv

--------------------------------

idvid

Video identification script

Part of the tovid suite, version 0.31

http://www.tovid.org

--------------------------------

Analyzing file: 'video.wmv'. This may take several minutes...

=========================================================

File: video.wmv

Width: 1280 pixels

Height: 720 pixels

Aspect ratio: 1.77:1

Frames: 63352

Duration: 00:35:13 hours/mins/secs

Framerate: 1000.000 frames per second

Video format: WMV3

Video bitrate: 3000000 bits per second

---------------------------

Audio track 1 (Stream 0.0, AID 0):

---------------------------

Codec: wmav2

Bitrate: 0000 bits per second

Sampling rate: 44100 Hz

=========================================================

Audio is compliant with the following formats:

Not compliant with (S)VCD or DVD

Video is compliant with the following formats:

Not compliant with (S)VCD or DVD

This video does not seem to be compliant with (S)VCD or DVD

standards. If you burn it to a video disc, it may not work.

=========================================================
Finally, another tool that works very well is exiftool. It’s available in the libimage-exiftool-perl package. The output is also very straight forward, and easy to interpret. It’s also a lot faster than idvid because the tool only displays metadata, which in some cases can be misleading.Mplayer and tovid actually probe the video, providing very accurate information at the cost of speed.
exiftool video.wmv

ExifTool Version Number : 7.30

File Name : video.wmv

Directory : .

File Modification Date/Time : 2009:04:20 09:21:58

File Type : WMV

MIME Type : video/x-ms-wmv

File ID : 12341234-1234-1234-1234-123412341234

File Size : 823200182

Creation Date : 2009:03:31 02:52:55Z

Data Packets : 102833

Play Duration : 35:16

Send Duration : 35:13

Preroll : 3000

Flags : 2

Min Packet Size : 8000

Max Packet Size : 8000

Max Bitrate : 3122812

Is VBR : False

Audio Codec Name : Windows Media Audio 9.2

Audio Codec Description : 96 kbps, 44 kHz, stereo 1-pass CBR

Video Codec Name : Windows Media Video 9

Video Codec Description : Professional

Audio Codec ID : Windows Media Audio V2 V7 V8 V9 / DivX audio (WMA) / Alex AC3 Audio

Audio Channels : 2

Audio Sample Rate : 44100

Stream Type : Video

Error Correction Type : No Error Correction

Time Offset : 0 s

Stream Number : 2

Image Width : 1280

Image Height : 720

Title :

Author :

Copyright :

Description :

Rating :

Image Size : 1280x720
As always, comments and additional tips are welcome!
Posted by admin on September 23, 2009 under Tech Tips |
Two great packages available to the Linux community are RAR and UNRAR. If you are already familiar with the RAR compression format, these allow you to create, modify and extract RAR archives. For those of you that appreciate the graphical compression application for Gnome called File Roller, these packages enable it to read RAR files. For more information about the RAR format, check out rarsoft.com.
To install from Ubuntu or Debian, its as simple as:
sudo apt-get install rar unrar
To list the files in a RAR archive, use the l or v option:
rar l video.rar
To decompress a RAR archive called video.rar, simply issue the command:
unrar e video.rar
The unrar package is only intended for decompression tasks. Otherwise, just use the rar command with the e option to extract the files to the current directory.
rar e video.rar
To compress a single file called video.avi, adding it to a RAR file called video.rar:
rar a video.rar video.avi
To compress a single file called video.avi, splitting it into approximately 50 Mb files:
rar a -v50000 video.rar video.avi
This by default creates archive files starting with video.part01.rar, video.part02.rar and following the sequence to completion. To use the older and better known extension sequence format of .rar, .r00, .r01, etc, use the -vn option like so:
rar a -v50000 -vn video.rar video.avi
To compress an entire directory recursively, use the -r option:
rar a -r Documents.rar Documents/
To extract the files from an archive, such that the original directory structure is also recreated, use the x command:
rar x Documents.rar
There are so many other features available to the RAR format, so be sure to check out the man pages or the packaged documentation.
man rar

less /usr/share/doc/rar/rar.txt.gz
(if your version of less supports reading of compressed files)
Posted by admin on June 21, 2009 under Tech Tips |
I recently needed to organize a large number of old digital photos that had the wrong date embedded in their EXIF tag data. The camera I used many years ago would often lose track of time and would sometimes be set to the wrong year. Applications I now use to organize photos read this data and made my albums difficult to navigate. I came across a Linux command line utility called jhead that allows you to modify this information to whatever you wish, and its easy to use in scripts as well. Installing was easy, because it’s currently in most repositories, including Ubuntu’s.
To read existing EXIF tag data, simply run jhead against an image without any options. As you can see from the example below, my date is set to the year 2022.
jhead image.jpg

File name : image.jpg

File size : 159390 bytes

File date : 2004:01:12 07:35:23

Camera make : Samsung

Camera model : Digimax 200

Date/Time : 2022:02:12 04:04:17

Resolution : 800 x 600

Flash used : Yes

Exposure time: 0.045 s (1/22)

Aperture : f/2.8
To clear all EXIF data from the file, use the -de option. Then recreate the EXIF fields with the -mkexif option, and check the data again. Notice the new Date/Time is set to the timestamp on the file.
jhead -de image.jpg

Modified: image.jpg
jhead -mkexif image.jpg

Modified: image.jpg
jhead image.jpg

File name : image.jpg

File size : 147751 bytes

File date : 2004:01:12 07:35:23

Date/Time : 2004:01:12 07:35:23

Resolution : 800 x 600
To change the entire timestamp manually, use the -ts option. Notice, there is no space between the -ts and the option. I could not trust the month and day, so I simply chaged the date to midnight on January 1, 2003.
jhead -ts2003:01:01-00:00:00 image.jpg

Modified: image.jpg
jhead image.jpg

File name : image.jpg

File size : 147751 bytes

File date : 2004:01:12 07:35:23

Date/Time : 2003:01:01 00:00:00

Resolution : 800 x 600
For many more options, check out the man page or visit the jhead site for more info.
Posted by admin on April 6, 2009 under Tech Tips |
Line wrapping text from the command line is easy with the fold utility, which of course is provided by the Free Software Foundation. By default, the fold command will wrap text at 80 characters, but you can of course specify the width manually. I prefer using the -s option, which will break only on spaces, making sure not to break in the middle of a word.
For example, the following command will concatenate a text file to standard output, adding line breaks only at spaces or at 72 characters, whichever comes first.
fold -s -w 72 textfile.txt
This can also be useful if you want to clearsign a message with Gnupg, but wish to line wrap it beforehand.
fold -s -w 72 textfile.txt | gpg --clearsign -u [email protected]
Add redirection if you wish to output the results to a file.
fold -s -w 72 textfile.txt > newfile.txt
As mentioned here, the fmt command also provides the same primary features of fold, but is much better. Not only does it wrap long lines, but it also fills out short lines as well. There are additional options that are worth looking into. Be sure to check out the man page!
man fmt
Posted by admin on September 30, 2007 under Tech Tips |
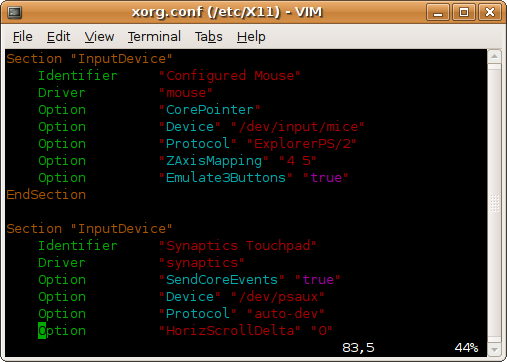
Turing on colored syntax highlighting in Vim can make it easier when looking through complicated text files, scripts, and source code. To quickly turn on or off the feature, use the “syntax” command within Vim:
:syntax on

:syntax off
The results are great. Here’s a screenshot of Vim in color.
To make the feature permanent, edit the file /etc/vim/vimrc, or as your Vim package maintainer may suggest, /etc/vim/vimrc.local. One can also make the change simply for their user only by editing ~/.vimrc. In all cases, simply add the following line at the end of the file:
:syntax on
Users of Ubuntu by default have vim-tiny, which as it’s name suggests, is a smaller version of the Vim editor. This version does not support syntax highlighting and a number of other features. Of course, remedying this is very easy by installing the full featured vim:
# sudo apt-get install vim
Happy editing.
Posted by admin on September 2, 2007 under Tech Tips |
If you would like to make it easier to visually spot what you are looking for when using “grep”, try out the “–color” flag. This option highlights any matches in the output of your search, giving you an upper hand when trying to visually scan through complicated or cumbersome sequences.
For example, if you were looking for any IP address in your /etc/hosts.deny file that has the number “209” in it, issue the following command:
grep --color 209 /etc/hosts.deny
Here is the comparison of the same output, with and without the color option.


As you can see, one might find it very easy to miss the fact that there are some IP addresses that have multiple octets with the value of 209. The color flag really comes in handy.
UPDATE (12/13/2009): In the most recent versions of Ubuntu, a local alias has been defined in the default .bashrc for each user. This alias gives turns on color highlighting with the following line.
alias grep='grep --color=auto'
Posted by admin on June 3, 2007 under Tech Tips |
If you ever need to work with a large file and wish you could split it into smaller pieces, you’ll be pleased to know that it’s extremely easy to do in Linux. You can use the “split” utility that comes standard with most *nix variations. Lets take a look at a couple easy examples.
To create a test file to work with, the following will create one that’s exactly 100 megabytes. Note, I am using ‘dd’ with /dev/urandom to demonstrate that the results of the split and reassembly are completely accurate. This will be accomplished via md5 hash comparisons at the end of this process.
$ dd if=/dev/urandom of=testfile bs=1k count=102400

102400+0 records in

102400+0 records out

104857600 bytes (105 MB) copied, 23.2982 seconds, 4.5 MB/s
$ ls -lh testfile

-rw-r--r-- 1 gmendoza gmendoza 100M 2007-06-03 22:45 testfile
To split the file into five 20MB files, use the split command as shown below. Note, I am producing five files with a new naming convention of “splitfiles”.
$ split -b 20971520 -d testfile splitfiles
Verify by listing all files that begin with “splitfiles”. Below, you see the new files with the appropriate sequence numbers as a result of the split command.
$ ls -l splitfiles*

-rw-r--r-- 1 gmendoza gmendoza 20971520 2007-06-03 22:47 splitfiles00

-rw-r--r-- 1 gmendoza gmendoza 20971520 2007-06-03 22:47 splitfiles01

-rw-r--r-- 1 gmendoza gmendoza 20971520 2007-06-03 22:47 splitfiles02

-rw-r--r-- 1 gmendoza gmendoza 20971520 2007-06-03 22:47 splitfiles03

-rw-r--r-- 1 gmendoza gmendoza 20971520 2007-06-03 22:47 splitfiles04
To reassemble the smaller files back to their original state, concatenate them together using a simple redirect.
$ cat splitfile* > newtestfile
… and list again to show your handy work…
$ ls -lh newtestfile

-rw-r--r-- 1 gmendoza gmendoza 100M 2007-06-03 22:52 newtestfile
As proof that both the original and newly reassembled files are exactly the same, check the results of a cryptographic md5 hash:
$ md5sum testfile newtestfile

54a07d5011ca893eddfab29960a7f232 testfile

54a07d5011ca893eddfab29960a7f232 newtestfile
Cool stuff.
Posted by admin on June 1, 2007 under Tech Tips |
If you’re an avid user of Ubuntu or other Debian based Linux distributions, then you’re probably very familiar with using APT and it’s related command line utilities. You might however find it useful to create some command line aliases that shorten the time it takes to type out these repetitive tasks.
For example,
"sudo apt-get update" can be shortened to "agu".

"sudo apt-get install" can be shortened to "agi".

"sudo apt-get dist-upgrade" can be shorted to "agd".
A very simple way to create a set of command line aliases would be to add them to your ~/.bashrcfile located in your users home directory. Here’s an example of some of my favorite APT aliases.
# Favorite Aliases
alias agu='sudo apt-get update'
alias agi='sudo apt-get install'
alias agd='sudo apt-get dist-upgrade'
alias agr='sudo apt-get remove'
alias ags='sudo aptitude search'
alias agsh='sudo apt-cache show'
alias afs='sudo apt-file search'
alias afsh='sudo apt-file show'
alias afu='sudo apt-file update'
|
To apply the changes immediately to your bash profile without having to log out, simply run the following command:
. .bashrc
Now, if you want to install the “vim-full” package, simply issue the following command:
agi vim-full
Remember, because “sudo” has been added to your alias, you don’t have to type it every time. It will prompt you to use the password the first time, and won’t ask again for the duration of the defined timeout period. Cool?
“apt-file” is a very useful package you should install. The alias is defined above, but is not installed by default. It allows you to search for file names in all packages from all your defined repositories. For example, lets say you’ve tried to run an application and it claims that your’re missing the library “libstdc++.so.5.0.7”. The following example tells you which packages contains a file with that name, which you can then install.
afs libstdc++.so.5.0.7

libstdc++5: usr/lib/libstdc++.so.5.0.7

libstdc++5-3.3-dbg: usr/lib/debug/libstdc++.so.5.0.7

agi libstdc++5
Although these examples have been geared towards Debian and Ubuntu, you can obviously use aliases on any Unix-like operating system. The technique of applying them just varies depending on the shell environment you are using. Have fun!


